android - Get current activity root view


MainActivity.java


package com.cfsuman.androidtutorials;

import android.graphics.Color;
import android.os.Bundle;
import android.app.Activity;
import android.view.ViewGroup;
import android.widget.Button;


public class MainActivity extends Activity {
@Override
protected void onCreate(Bundle savedInstanceState) {
super.onCreate(savedInstanceState);
setContentView(R.layout.activity_main);

// Get the widgets reference from XML layout
Button button = findViewById(R.id.button);


// Set a click listener for Button widget
button.setOnClickListener(view -> {
// Get the view which you added by
// activity setContentView() method.
ViewGroup viewGroup = (ViewGroup) ((ViewGroup)
(findViewById(android.R.id.content)))
.getChildAt(0);

viewGroup.setBackgroundColor(
Color.parseColor("#676767")
);
});
}
}


activity_main.xml


<?xml version="1.0" encoding="utf-8"?>
<androidx.constraintlayout.widget.ConstraintLayout
xmlns:android="http://schemas.android.com/apk/res/android"
xmlns:app="http://schemas.android.com/apk/res-auto"
android:layout_width="match_parent"
android:layout_height="match_parent"
android:background="#DCDCDC"
android:padding="24dp">

<Button
android:id="@+id/button"
android:layout_width="wrap_content"
android:layout_height="wrap_content"
android:text="Color Activity Root View"
app:layout_constraintStart_toStartOf="parent"
app:layout_constraintTop_toTopOf="parent" />

</androidx.constraintlayout.widget.ConstraintLayout>


android - Request multiple permissions example


activity_main.xml


<?xml version="1.0" encoding="utf-8"?>
<LinearLayout
xmlns:android="http://schemas.android.com/apk/res/android"
xmlns:app="http://schemas.android.com/apk/res-auto"
xmlns:tools="http://schemas.android.com/tools"
android:id="@+id/root_layout"
android:layout_width="match_parent"
android:layout_height="match_parent"
android:padding="16dp"
android:orientation="vertical"
android:background="#e5ead3"
>
<Button
android:id="@+id/btn_do_task"
android:layout_width="wrap_content"
android:layout_height="wrap_content"
android:text="Check Permissions"
/>
</LinearLayout>


MainActivity.java


package com.cfsuman.me.androidcodesnippets;

import android.Manifest;
import android.app.Activity;
import android.app.AlertDialog;
import android.content.Context;
import android.content.DialogInterface;
import android.content.pm.PackageManager;
import android.os.Build;
import android.support.v4.app.ActivityCompat;
import android.support.v4.content.ContextCompat;
import android.support.v7.app.AppCompatActivity;
import android.os.Bundle;
import android.view.View;
import android.widget.Button;
import android.widget.LinearLayout;
import android.widget.Toast;


public class MainActivity extends AppCompatActivity {
private Context mContext;
private Activity mActivity;

private LinearLayout mRootLayout;
private Button mBtnDoTask;

private static final int MY_PERMISSIONS_REQUEST_CODE = 123;

@Override
protected void onCreate(Bundle savedInstanceState) {
super.onCreate(savedInstanceState);
setContentView(R.layout.activity_main);

// Get the application context
mContext = getApplicationContext();
mActivity = MainActivity.this;

// Get the widget reference from xml layout
mRootLayout = findViewById(R.id.root_layout);
mBtnDoTask = findViewById(R.id.btn_do_task);

// Set a click listener for the button
mBtnDoTask.setOnClickListener(new View.OnClickListener() {
@Override
public void onClick(View view) {
if(Build.VERSION.SDK_INT >= Build.VERSION_CODES.M){
checkPermission();
}
}
});
}

protected void checkPermission(){
if(ContextCompat.checkSelfPermission(mActivity,Manifest.permission.CAMERA)
+ ContextCompat.checkSelfPermission(
mActivity,Manifest.permission.READ_CONTACTS)
+ ContextCompat.checkSelfPermission(
mActivity,Manifest.permission.WRITE_EXTERNAL_STORAGE)
!= PackageManager.PERMISSION_GRANTED){

// Do something, when permissions not granted
if(ActivityCompat.shouldShowRequestPermissionRationale(
mActivity,Manifest.permission.CAMERA)
|| ActivityCompat.shouldShowRequestPermissionRationale(
mActivity,Manifest.permission.READ_CONTACTS)
|| ActivityCompat.shouldShowRequestPermissionRationale(
mActivity,Manifest.permission.WRITE_EXTERNAL_STORAGE)){
// If we should give explanation of requested permissions

// Show an alert dialog here with request explanation
AlertDialog.Builder builder = new AlertDialog.Builder(mActivity);
builder.setMessage("Camera, Read Contacts and Write External" +
" Storage permissions are required to do the task.");
builder.setTitle("Please grant those permissions");
builder.setPositiveButton("OK", new DialogInterface.OnClickListener() {
@Override
public void onClick(DialogInterface dialogInterface, int i) {
ActivityCompat.requestPermissions(
mActivity,
new String[]{
Manifest.permission.CAMERA,
Manifest.permission.READ_CONTACTS,
Manifest.permission.WRITE_EXTERNAL_STORAGE
},
MY_PERMISSIONS_REQUEST_CODE
);
}
});
builder.setNeutralButton("Cancel",null);
AlertDialog dialog = builder.create();
dialog.show();
}else{
// Directly request for required permissions, without explanation
ActivityCompat.requestPermissions(
mActivity,
new String[]{
Manifest.permission.CAMERA,
Manifest.permission.READ_CONTACTS,
Manifest.permission.WRITE_EXTERNAL_STORAGE
},
MY_PERMISSIONS_REQUEST_CODE
);
}
}else {
// Do something, when permissions are already granted
Toast.makeText(mContext,"Permissions already granted",Toast.LENGTH_SHORT).show();
}
}

@Override
public void onRequestPermissionsResult(int requestCode, String[] permissions, int[] grantResults){
switch (requestCode){
case MY_PERMISSIONS_REQUEST_CODE:{
// When request is cancelled, the results array are empty
if(
(grantResults.length >0) &&
(grantResults[0]
+ grantResults[1]
+ grantResults[2]
== PackageManager.PERMISSION_GRANTED
)
){
// Permissions are granted
Toast.makeText(mContext,"Permissions granted.",Toast.LENGTH_SHORT).show();
}else {
// Permissions are denied
Toast.makeText(mContext,"Permissions denied.",Toast.LENGTH_SHORT).show();
}
return;
}
}
}
}


AndroidManifest.xml [Permissions]


<uses-permission android:name="android.permission.CAMERA"/>
<uses-permission android:name="android.permission.WRITE_EXTERNAL_STORAGE"/>
<uses-permission android:name="android.permission.READ_CONTACTS"/>




UWP - How to use CalendarDatePicker

UWP CalendarDatePicker
The CalendarDatePicker class represents a control that allows a UWP app user to pick a date from a calendar display. The UWP app developers can use a CalendarDatePicker to show a drop-down control that is optimized for picking a single date from a calendar view where the fullness of the calendar is important.

The CalendarDatePicker control is similar to the DatePicker control, but the DatePicker has no calendar view. The windows app developers can customize the CalendarDatePicker widget with a minimal amount of XAML or other code. The CalendarDatePicker control has an internal calendar view for picking a date. It also has a subset of CalendarView properties to let the windows developers customize it.

The CalendarDatePicker DateChanged event occurs when the date value is changed in a CalendarDatePicker widget. So, using this event, the Windows UWP developers can instantly get the CalendarDatePicker control’s selected date.

The CalendarDatePicker class’s Date property allows us to get or set the date currently set in the calendar picker. This Date property value type is DateTimeOffset which represents the date currently set in the calendar picker.

The following Windows UWP app development tutorial will demonstrate how to use the CalendarDatePicker control and how the developers can get the CalendarDatePicker widget’s selected date while a user makes a change. In this tutorial code, we also format the CalendarDatePicker control’s selected date using the ToString() method.
MainPage.xaml

<Page
    x:Class="UniversalAppTutorials.MainPage"
    xmlns="http://schemas.microsoft.com/winfx/2006/xaml/presentation"
    xmlns:x="http://schemas.microsoft.com/winfx/2006/xaml"
    xmlns:local="using:UniversalAppTutorials"
    xmlns:d="http://schemas.microsoft.com/expression/blend/2008"
    xmlns:mc="http://schemas.openxmlformats.org/markup-compatibility/2006"
    mc:Ignorable="d">
    <StackPanel 
        x:Name="stack_panel1" 
        Orientation="Vertical"
        Background="AntiqueWhite"
        Padding="50,175,50,25"
        >
        <CalendarDatePicker
            x:Name="CalendarDatePicker1"
            Header="Select A Date"
            DateChanged="CalendarDatePicker1_DateChanged"
            />
        <TextBlock
            x:Name="TextBlock1"
            Foreground="DarkBlue"
            FontSize="21"
            TextWrapping="Wrap"
            FontFamily="Consolas"
            Margin="20"
            />
    </StackPanel>
</Page>

UWP - How to use TimePicker

UWP TimePicker
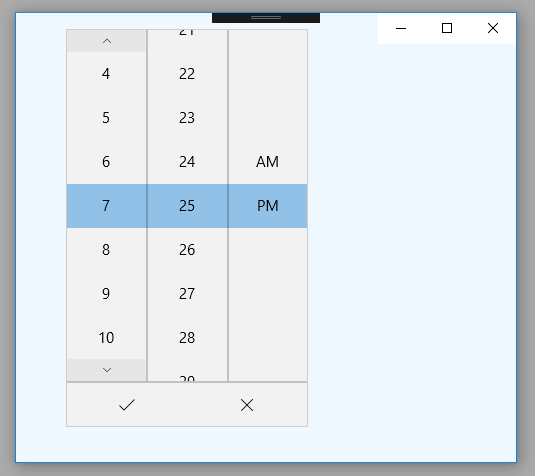
The TimePicker class represents a control that allows a UWP app user to pick a time value. The TimePicker widget gives the app developers a standardized way to let UWP app users pick a time value using touch, mouse, or keyboard input.

The Windows UWP app developers can use a TimePicker to let a user enter a single time value. The developers can customize the TimePicker to use a 12-hour or 24-hour clock.

The UWP TimePicker control shows a 12-hour clock with an AM PM selector by default. The Windows app developers can set the TimePicker class’s ClockIdentifier property to 24HourClock to show a 24-hour clock instead.

The TimePicker class’s TimeChanged event occurs when the value of the Time property is changed. So using this event, the Windows UWP developers can instantly get the TimePicker control’s selected time.

The TimePicker class’s Time property allows us to get or set the time currently set in the TimePicker control. This Time property value type is TimeSpan which represents the time currently set in the TimePicker widget.

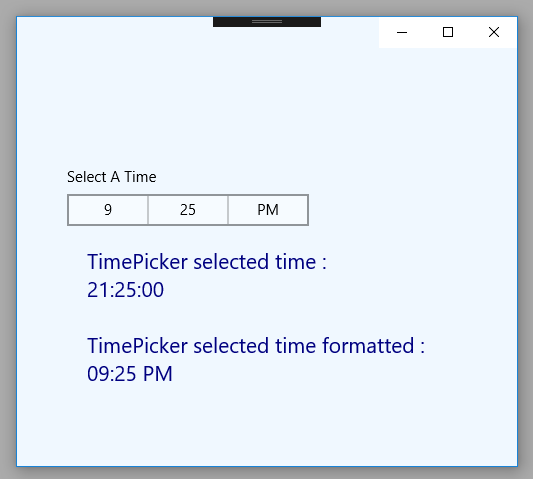
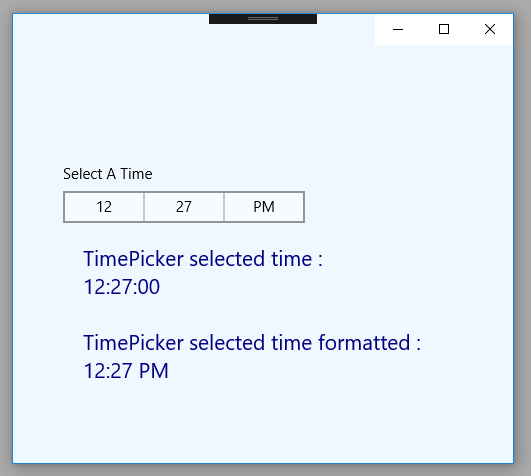
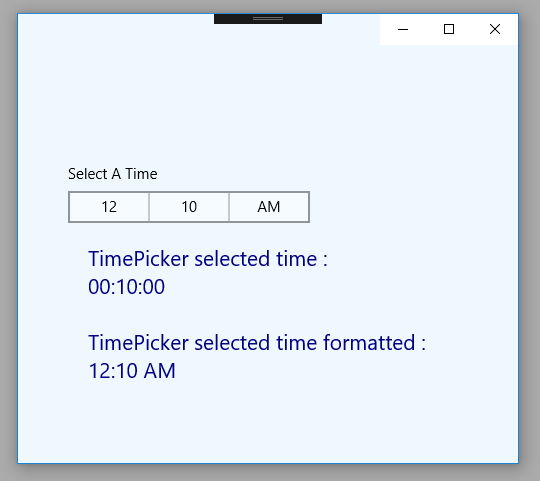
The following Windows UWP app development tutorial will demonstrate how to use the TimePicker control and how the Windows developers can get the TimePicker control’s selected time while a user makes a change. In this tutorial code, we also format the TimePicker control’s selected time to display AM PM state.
MainPage.xaml

<Page
    x:Class="UniversalAppTutorials.MainPage"
    xmlns="http://schemas.microsoft.com/winfx/2006/xaml/presentation"
    xmlns:x="http://schemas.microsoft.com/winfx/2006/xaml"
    xmlns:local="using:UniversalAppTutorials"
    xmlns:d="http://schemas.microsoft.com/expression/blend/2008"
    xmlns:mc="http://schemas.openxmlformats.org/markup-compatibility/2006"
    mc:Ignorable="d">
    <StackPanel 
        x:Name="stack_panel1" 
        Orientation="Vertical"
        Background="AliceBlue"
        Padding="50,150,50,25"
        >
        <TimePicker
            x:Name="TimePicker1"
            TimeChanged="TimePicker1_TimeChanged"
            Header="Select A Time"
            />
        <TextBlock
            x:Name="TextBlock1"
            Foreground="Navy"
            FontSize="21"
            TextWrapping="Wrap"
            Margin="20"
            />
    </StackPanel>
</Page>
MainPage.xaml.cs

using Windows.UI.Xaml.Controls;


namespace UniversalAppTutorials
{
    public sealed partial class MainPage : Page
    {
        public MainPage()
        {
            this.InitializeComponent();
        }

        private void TimePicker1_TimeChanged(object sender, TimePickerValueChangedEventArgs e)
        {
            // Get the instance of TimePicker object
            TimePicker timePicker = sender as TimePicker;

            // Get the TimePicker selected date
            TextBlock1.Text = "TimePicker selected time :\n";
            TextBlock1.Text += "" + timePicker.Time;

            // Format TimePicker selected time and display it
            TextBlock1.Text += "\n\nTimePicker selected time formatted :";
            TextBlock1.Text += "\n" + formatTime(
                timePicker.Time.Hours,
                timePicker.Time.Minutes
                );
        }

        // Custom method to format time
        private string formatTime(int hours, int minutes) {
            // Put minutes in a string to format it
            string minutesString = minutes.ToString();

            // Determine the AM PM state
            bool isPM = hours > 11;
            string aMPMString = "AM";

            if (isPM)
            {
                aMPMString = "PM";
                if (hours != 12)
                {
                    hours -= 12;
                }
            }

            if (hours == 0)
            {
                hours = 12;
            }

            // Padding minutes with zero
            if (minutesString.Length == 1)
            {
                minutesString = minutesString.PadLeft(2, '0');
            }

            // Put hours in a string to format it
            string hoursString = hours.ToString();

            // Padding hours with zero
            if (hoursString.Length == 1)
            {
                hoursString = hoursString.PadLeft(2, '0');
            }

            // Put the formatted time in a string
            string formattedTime = hoursString + ":"+ minutesString + " " + aMPMString;

            // Finally, retrun the formatted time as a string
            return formattedTime;
        }
    }
}

UWP - Format DatePicker selected date

MainPage.xaml

<Page
    x:Class="UniversalAppTutorials.MainPage"
    xmlns="http://schemas.microsoft.com/winfx/2006/xaml/presentation"
    xmlns:x="http://schemas.microsoft.com/winfx/2006/xaml"
    xmlns:local="using:UniversalAppTutorials"
    xmlns:d="http://schemas.microsoft.com/expression/blend/2008"
    xmlns:mc="http://schemas.openxmlformats.org/markup-compatibility/2006"
    mc:Ignorable="d">
    <StackPanel 
        x:Name="stack_panel1" 
        Orientation="Vertical"
        Background="Snow"
        Padding="50"
        >
        <DatePicker
            x:Name="DatePicker1"
            DateChanged="DatePicker1_DateChanged"
            Header="Select A Date"
            />
        <TextBlock
            x:Name="TextBlock1"
            Foreground="Navy"
            FontSize="21"
            TextWrapping="Wrap"
            Margin="20"
            />
    </StackPanel>
</Page>
MainPage.xaml.cs

using System.Globalization;
using Windows.UI.Xaml.Controls;


namespace UniversalAppTutorials
{
    public sealed partial class MainPage : Page
    {
        public MainPage()
        {
            this.InitializeComponent();
        }

        private void DatePicker1_DateChanged(object sender, DatePickerValueChangedEventArgs e)
        {
            // Get the instance of DatePicker object
            DatePicker datePicker = sender as DatePicker;

            // When date change
            TextBlock1.Text = "You selected:";

            // Get the DatePicker selected date
            TextBlock1.Text += "\n" + datePicker.Date;

            // Format DatePicker selected date using ToString method.
            TextBlock1.Text += "\nShort date: " + datePicker.Date.ToString("d");
            TextBlock1.Text += "\nLong date: " + datePicker.Date.ToString("D");
            TextBlock1.Text += "\nFull date and short time: " + datePicker.Date.ToString("f");
            TextBlock1.Text += "\nFull date and long time: " + datePicker.Date.ToString("F");
            TextBlock1.Text += "\nGeneral date time (short time): " + datePicker.Date.ToString("g");
            TextBlock1.Text += "\nGeneral date time (long time): " + datePicker.Date.ToString("G");
            TextBlock1.Text += "\nMonth pattern: " + datePicker.Date.ToString("M");
            TextBlock1.Text += "\nYear pattern: " + datePicker.Date.ToString("Y");

            // This line create a culture for english in us
            CultureInfo usCulture = new CultureInfo("en-US");

            // Create more culture
            CultureInfo frCulture = new CultureInfo("fr-FR");
            CultureInfo gbCulture = new CultureInfo("en-GB");
            CultureInfo dkCulture = new CultureInfo("da-DK");

            // String format date using string.format method
            TextBlock1.Text += "\n\nDate time format in [en-US] culture: " 
                + string.Format(usCulture, "{0:d}", datePicker.Date);

            TextBlock1.Text += "\nDate time format in [fr-FR] culture: " 
                + string.Format(frCulture, "{0:d}", datePicker.Date);

            TextBlock1.Text += "\nDate time format in [en-GB] culture: " 
                + string.Format(gbCulture, "{0:d}", datePicker.Date);

            TextBlock1.Text += "\nDate time format in [da-DK] culture: " 
                + string.Format(dkCulture, "{0:d}", datePicker.Date);
        }
    }
}

UWP - How to use DatePicker

UWP DatePicker
The DatePicker class represents a control that allows a UWP app user to pick a date value. The UWP app developers can use a DatePicker control to let UWP app users enter a date value. The user picks the date using ComboBox selection for month, day, and year values. The UWP app developers can customize the DatePicker widget’s default look.

The DatePicker widget shows the day, month, and year by default. The UWP app developers can hide any field that they don't need. To hide a field from the DatePicker widget, set its corresponding fieldVisible property to false.

A DateTimeFormatter creates the string content of each ComboBox in the DatePicker. The .net developers can use a string that is either a format template or a format pattern to specify the format.

The DatePicker DateChanged event occurs when the date value is changed in a DatePicker widget. So, using this event, the UWP developers can instantly get the DatePicker widget’s selected date.

The DatePicker class’s Date property allows us to get or set the date currently set in the date picker. This Date property value type is DateTimeOffset which represents the date currently set in the picker.

The DatePicker widget has both Date and SelectedDate properties. The difference between the Date and SelectedDate properties is that Date is not nullable, while SelectedDate is nullable.

The following UWP app development tutorial will demonstrate how to use the DatePicker widget and how can get the DatePicker widget’s selected date while a user makes a change. Here we also format the DatePicker widget’s selected date using the ToString() method.
MainPage.xaml

<Page
    x:Class="UniversalAppTutorials.MainPage"
    xmlns="http://schemas.microsoft.com/winfx/2006/xaml/presentation"
    xmlns:x="http://schemas.microsoft.com/winfx/2006/xaml"
    xmlns:local="using:UniversalAppTutorials"
    xmlns:d="http://schemas.microsoft.com/expression/blend/2008"
    xmlns:mc="http://schemas.openxmlformats.org/markup-compatibility/2006"
    mc:Ignorable="d">
    <StackPanel 
        x:Name="stack_panel1" 
        Orientation="Horizontal"
        Background="GhostWhite"
        Padding="50"
        >
        <DatePicker
            x:Name="DatePicker1"
            DateChanged="DatePicker1_DateChanged"
            />
        <TextBlock
            x:Name="TextBlock1"
            Foreground="Navy"
            FontSize="22"
            TextWrapping="Wrap"
            Margin="10,75,10,10"
            />
    </StackPanel>
</Page>
MainPage.xaml.cs

using Windows.UI.Xaml.Controls;


namespace UniversalAppTutorials
{
    public sealed partial class MainPage : Page
    {
        public MainPage()
        {
            this.InitializeComponent();
        }

        private void DatePicker1_DateChanged(object sender, DatePickerValueChangedEventArgs e)
        {
            // Get the instance of DatePicker object
            DatePicker datePicker = sender as DatePicker;

            // When date changed
            TextBlock1.Text = "You selected:";

            // Get the DatePicker selected date
            TextBlock1.Text += "\n" + datePicker.Date;

            // Format the DatePicker selected date
            TextBlock1.Text += "\n" + datePicker.Date.ToString("dd-MM-yyyy");
            TextBlock1.Text += "\n" + datePicker.Date.ToString("dd/MMM/yyyy");
        }
    }
}

UWP - How to use PasswordBox

UWP PasswordBox
The PasswordBox class represents a control for entering passwords. PasswordBox lets a user enter a masked password. The Windows UWP app users can enter a single line of non-wrapping text in a PasswordBox control. The PasswordBox text is not displayed while it is entered, only masked characters are displayed. The .net developers can specify this password character by setting the PasswordChar property.

The PasswordBox class PasswordRevealMode property gets or sets a value that specifies whether the password is always, never, or optionally obscured. This property value is a value of the enumeration that specifies whether the password is always, never, or optionally obscured. The default value of this property is Peek which ensures the password reveal button is visible and the password is not obscured while the button is pressed.

The PasswordBox class PasswordChar property gets or sets the masking character for the PasswordBox. This property value is a String which is a masking character to echo when the user enters text into the PasswordBox. The default value of this property is a bullet character.

The PasswordBox class’s Password property gets or sets the password currently held by the PasswordBox. This property value is a String which represents the password currently held by the PasswordBox. The default value of this property is an empty string. The UWP app developers can use the Password property to get or set the content of the PasswordBox.

The PasswordBox PasswordChanged event occurs when the value of the Password property changes. Using this event the .net developers can get the user’s entered password at runtime. The .net developers can handle the PasswordChanged event to get the Password value while the app user enters it.
MainPage.xaml

<Page
    x:Class="UniversalAppTutorials.MainPage"
    xmlns="http://schemas.microsoft.com/winfx/2006/xaml/presentation"
    xmlns:x="http://schemas.microsoft.com/winfx/2006/xaml"
    xmlns:local="using:UniversalAppTutorials"
    xmlns:d="http://schemas.microsoft.com/expression/blend/2008"
    xmlns:mc="http://schemas.openxmlformats.org/markup-compatibility/2006"
    mc:Ignorable="d">
    <StackPanel 
        x:Name="stack_panel1" 
        Orientation="Vertical"
        Background="GhostWhite"
        Padding="100"
        >
        <TextBlock
            x:Name="TextBlock1"
            Foreground="Crimson"
            Margin="15"
            FontSize="20"
            />
        <PasswordBox
            x:Name="PasswordBox1"
            Header="Password"
            PlaceholderText="Input your password."
            Width="300"
            MaxLength="20"
            PasswordChar="#"
            PasswordRevealMode="Peek"
            PasswordChanged="PasswordBox1_PasswordChanged"
            />
    </StackPanel>
</Page>
MainPage.xaml.cs

using Windows.UI.Xaml.Controls;
using Windows.UI.Xaml;


namespace UniversalAppTutorials
{
    public sealed partial class MainPage : Page
    {
        public MainPage()
        {
            this.InitializeComponent();
        }

        private void PasswordBox1_PasswordChanged(object sender, RoutedEventArgs e)
        {
            // Cast the sender as a PasswordBox
            PasswordBox passwordBox = sender as PasswordBox;

            // Get the PasswordBox inputted string length
            int length = passwordBox.Password.Length;

            if (length > 0)
            {
                TextBlock1.Text = length + " Character(s).";
            }
            else {
                TextBlock1.Text = "Your password entry box is empty.";
            }
        }
    }
}

UWP - How to set ComboBox default selected item

UWP - Set ComboBox Default Selected Item
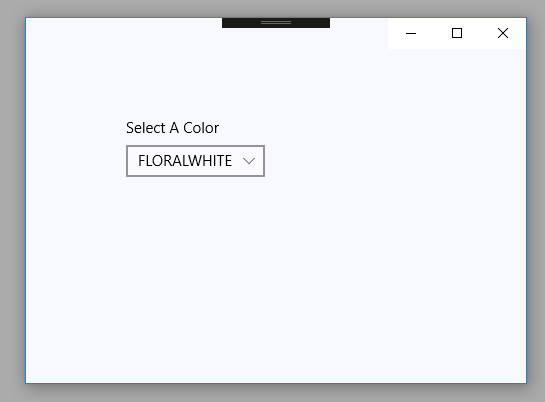
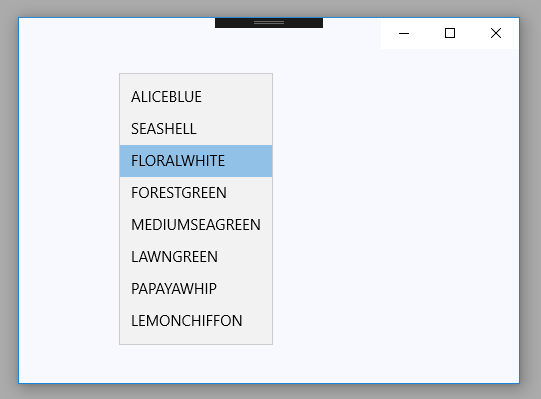
The ComboBox class represents a selection control that combines a non-editable text box and a drop-down list box that allows UWP app users to select an item from a list. The ComboBox starts in a compact state and it expands to display a list of selectable items. The ComoboBox control is also known as a drop-down list.

The following UWP app development tutorial code demonstrates how we can set the ComboBox default selected item. That means we will set an item of ComboBox as its pre-selected item. In this UWP example code, we populate the ComboBox with items from a String data type list.

The ItemsControl class’s ItemsSource property gets or sets an object source used to generate the content of the ItemsControl such as a ComboBox control. So we data bind the ComboBox control with a list of String values using this ItemsSource property.

Now the part is how we can make an item the default selected item of the ComboBox control. The UWP app developers can do that in two ways. They can set ComboBox’s selected index after data binding. Or they can set the selected item of the ComboBox at the initializing period.

The Selector class’s SelectedIndex property gets or sets the index of the selected item. This property value is an Int32 instance that is the index of the selected item. The default value of this property is -1, which indicates that no item is selected. So using this property we can initially set an item selected in a ComboBox control.

The Selector class’s SelectedItem property gets or sets the selected item. This property value is an Object instance that is the selected item. The default value is null. The UWP app developers can use this property to set the ComboBox default selected item.
MainPage.xaml

<Page
    x:Class="UniversalAppTutorials.MainPage"
    xmlns="http://schemas.microsoft.com/winfx/2006/xaml/presentation"
    xmlns:x="http://schemas.microsoft.com/winfx/2006/xaml"
    xmlns:local="using:UniversalAppTutorials"
    xmlns:d="http://schemas.microsoft.com/expression/blend/2008"
    xmlns:mc="http://schemas.openxmlformats.org/markup-compatibility/2006"
    mc:Ignorable="d">
    <StackPanel 
        x:Name="stack_panel1" 
        Orientation="Horizontal"
        Background="GhostWhite"
        Padding="100"
        >
        <ComboBox 
            x:Name="ComboBox1" 
            Header="Select A Color"
            >
        </ComboBox>
    </StackPanel>
</Page>
MainPage.xaml.cs

using Windows.UI.Xaml.Controls;
using System.Collections.Generic;


namespace UniversalAppTutorials
{
    public sealed partial class MainPage : Page
    {
        public MainPage()
        {
            this.InitializeComponent();

            // Initialize a new list of colors
            List<string> colors = new List<string>();

            // Put some colors to the list
            colors.Add("ALICEBLUE");
            colors.Add("SEASHELL");
            colors.Add("FLORALWHITE");
            colors.Add("FORESTGREEN");
            colors.Add("MEDIUMSEAGREEN");
            colors.Add("LAWNGREEN");
            colors.Add("PAPAYAWHIP");
            colors.Add("LEMONCHIFFON");

            // Finally, Specify the ComboBox items source
            ComboBox1.ItemsSource = colors;

            /*
                SelectedIndex
                    Gets or sets the index of the selected item.
                    (Inherited from Selector)
            */

            // Set the default selected item of ComboBox
            ComboBox1.SelectedIndex = 2;

            // Alternate way to specify a default selected item 
            //ComboBox1.SelectedItem = "LAWNGREEN";
        }
    }
}

UWP - ComboBox DisplayMemberPath and SelectedValuePath

UWP - ComboBox DisplayMemberPath and SelectedValuePath
The ComboBox class represents a selection control that combines a non-editable text box and a drop-down list box that allows UWP app users to select an item from a list. The ComboBox starts in a compact state and it expands to display a list of selectable items. The ComoboBox control is also known as a drop-down list.

The ItemsControl class’s DisplayMemberPath property gets or sets the name or path of the property that is displayed for each data item. This property value is a String instance that is the name or path of the property that is displayed for each data item in the control. The default value of this property is an empty string.

The Selector class’s SelectedValuePath property gets or sets the property path that is used to get the SelectedValue property of the SelectedItem property. This property value is also a String object that is the property path that is used to get the SelectedValue property of the SelectedItem property. The default value of this property is String.Empty.

The following UWP app development tutorial code demonstrates how we can use the DisplayMemberPath and SelectedValue path properties for ComboBox control. We data bind a list of objects with the ComboBox control.

We also add a selection changed event to the ComboBox control. The SelectionChanged event allows us to get the users selected item details when they make changes on selection. DisplayMemberPath and SelectedValuePath properties allow us to define the ComboBox item's text and value.
MainPage.xaml

<Page
    x:Class="UniversalAppTutorials.MainPage"
    xmlns="http://schemas.microsoft.com/winfx/2006/xaml/presentation"
    xmlns:x="http://schemas.microsoft.com/winfx/2006/xaml"
    xmlns:local="using:UniversalAppTutorials"
    xmlns:d="http://schemas.microsoft.com/expression/blend/2008"
    xmlns:mc="http://schemas.openxmlformats.org/markup-compatibility/2006"
    mc:Ignorable="d">
    <StackPanel 
        x:Name="stack_panel1" 
        Orientation="Horizontal"
        Background="LightYellow"
        Padding="100"
        >
        <ComboBox 
            x:Name="ComboBox1" 
            Header="Select A Color"
            DisplayMemberPath="ColorName"
            SelectedValuePath="ColorValue"
            SelectionChanged="ComboBox1_SelectionChanged"
            >
        </ComboBox>
        <TextBlock
            x:Name="TextBlock1"
            FontFamily="Consolas"
            FontSize="25"
            Foreground="DarkGreen"
            Margin="50,5,5,5"
            />
    </StackPanel>
</Page>
MainPage.xaml.cs

using Windows.UI.Xaml.Controls;
using System.Collections.Generic;


namespace UniversalAppTutorials
{
    public sealed partial class MainPage : Page
    {
        public MainPage()
        {
            this.InitializeComponent();

            // Initialize a new list of colors
            List<color> colors = new List<color>();

            // Put some items to the collection
            colors.Add(new color("INDIANRED", "#CD5C5C"));
            colors.Add(new color("SALMON", "#FA8072"));
            colors.Add(new color("CRIMSON", "#DC143C"));
            colors.Add(new color("DEEPPINK", "#FF1493"));
            colors.Add(new color("CORAL", "#FF7F50"));
            colors.Add(new color("ORANGE", "#FFA500"));
            colors.Add(new color("YELLOW", "#FFFF00"));
            colors.Add(new color("PEACHPUFF", "#FFDAB9"));

            // Specify the ComboBox items source
            ComboBox1.ItemsSource = colors;

            // Define the both properties programmatically
            //ComboBox1.DisplayMemberPath = "ColorName";
            //ComboBox1.SelectedValuePath = "ColorValue";
        }

        public class color{
            public string ColorName { get; set; }
            public string ColorValue { get; set; }

            public color(string colorName,string colorValue) {
                this.ColorName = colorName;
                this.ColorValue = colorValue;
            }
        }

        private void ComboBox1_SelectionChanged(object sender, SelectionChangedEventArgs e)
        {
            // Get the ComboBox instance
            ComboBox comboBox = sender as ComboBox;

            // Get the ComboBox selected item value and display on TextBlock
            TextBlock1.Text = "You selected:\n";
            TextBlock1.Text += "Value : " + comboBox.SelectedValue.ToString();
        }
    }
}

UWP - ComboBox item style example

MainPage.xaml

<Page
    x:Class="UniversalAppTutorials.MainPage"
    xmlns="http://schemas.microsoft.com/winfx/2006/xaml/presentation"
    xmlns:x="http://schemas.microsoft.com/winfx/2006/xaml"
    xmlns:local="using:UniversalAppTutorials"
    xmlns:d="http://schemas.microsoft.com/expression/blend/2008"
    xmlns:mc="http://schemas.openxmlformats.org/markup-compatibility/2006"
    mc:Ignorable="d">
    <StackPanel 
        x:Name="stack_panel1" 
        Orientation="Horizontal"
        Background="Azure"
        Padding="125"
        >
        <ComboBox 
            x:Name="ComboBox1" 
            Header="Select A Color"
            Foreground="Crimson"
            FontSize="22"
            FontFamily="MV Boli"
            >
        </ComboBox>
    </StackPanel>
</Page>
MainPage.xaml.cs

using Windows.UI.Xaml.Controls;
using Windows.UI.Xaml.Media;
using Windows.UI;
using Windows.UI.Xaml;
using Windows.UI.Text;


namespace UniversalAppTutorials
{
    public sealed partial class MainPage : Page
    {
        public MainPage()
        {
            this.InitializeComponent();

            // Initialize a new string array
            string[] colors = {
                "AntiqueWhite",
                "Green",
                "Orange",
                "DarkOliveGreen",
                "Cornsilk",
                "Cyan",
                "BlanchedAlmond",
                "Beige",
                "CornflowerBlue"
            };

            // Get the ComboBox item collection
            ItemCollection ic = ComboBox1.Items;

            // Loop through the array items
            for (int index = 0; index < colors.Length; index++)
            {
                // Initialize a new ComboBoxItem instance
                ComboBoxItem item = new ComboBoxItem();

                // Add the content to item
                item.Content = colors[index];

                // Set the item border as item separator
                item.BorderThickness = new Thickness(0, 0, 0, 2);
                item.BorderBrush = new SolidColorBrush(Colors.DarkBlue);

                // Item text style
                item.FontSize = 22;
                item.FontWeight = FontWeights.Medium;
                item.FontStretch = FontStretch.ExtraExpanded;
                item.FontFamily = new FontFamily("MV Boli");
                item.Padding = new Thickness(15, 10, 50, 10);
                item.Foreground = new SolidColorBrush(Colors.Navy);

                // Set the item width
                item.Width = 300;

                if (index % 2 == 0)
                {
                    // Set the regular item background
                    item.Background = new SolidColorBrush(Colors.CornflowerBlue);
                }
                else
                {
                    // Set the alternate item background
                    item.Background = new SolidColorBrush(Colors.SkyBlue);
                }

                // Finally, add the item to the ComboBox item collection
                ic.Add(item);
            }
        }
    }
}

UWP - How to get ComboBox selected value

UWP - Get ComboBox Selected Value
The ComboBox class represents a selection control that combines a non-editable text box and a drop-down list box that allows UWP app users to select an item from a list.

The UWP app developers can use a ComboBox to present a list of items that the app user can select from. The ComboBox starts in a compact state and it expands to display a list of selectable items. The ComoboBox control is also known as a drop-down list.

The ComboBox either displays the current selection or is empty if there is no selected item in its closed state. ComboBox displays the list of selectable items in its expanded state.

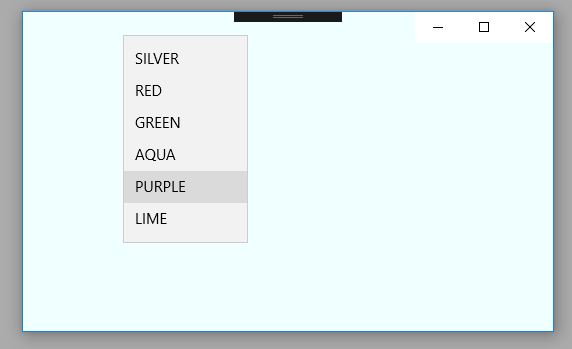
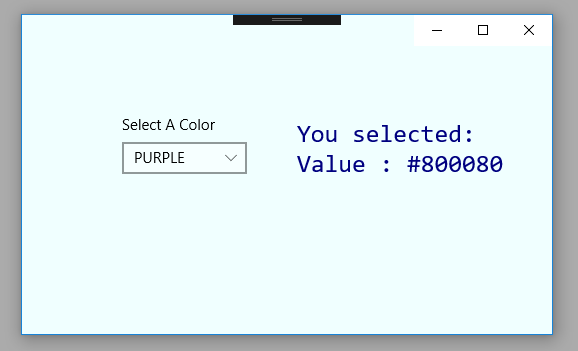
The following UWP app development tutorial code demonstrates how we can get the ComboBox selected value. Here we data bind the ComboBox control with Dictionary items. We also add a selection changed event to the ComboBox control, so we can get the selected item value when the user makes a selection on the ComboBox. The Selector class’s SelectedValuePath property gets or sets the property path that is used to get the SelectedValue property of the SelectedItem property.

The Selector class’s SelectionChanged event occurs when the currently selected item changes. And the Selector class’s SelectedValue property gets or sets the value of the selected item, obtained by using the SelectedValuePath. So using the SelectionChanged event and SelectedValue property we can get the ComboBox selected value at runtime.
MainPage.xaml

<Page
    x:Class="UniversalAppTutorials.MainPage"
    xmlns="http://schemas.microsoft.com/winfx/2006/xaml/presentation"
    xmlns:x="http://schemas.microsoft.com/winfx/2006/xaml"
    xmlns:local="using:UniversalAppTutorials"
    xmlns:d="http://schemas.microsoft.com/expression/blend/2008"
    xmlns:mc="http://schemas.openxmlformats.org/markup-compatibility/2006"
    mc:Ignorable="d">
    <StackPanel 
        x:Name="stack_panel1" 
        Orientation="Horizontal"
        Background="Azure"
        Padding="100"
        >
        <ComboBox 
            x:Name="ComboBox1" 
            Header="Select A Color"
            SelectionChanged="ComboBox1_SelectionChanged"
            >
        </ComboBox>
        <TextBlock
            x:Name="TextBlock1"
            FontFamily="Consolas"
            FontSize="25"
            Foreground="Navy"
            Margin="50,5,5,5"
            />
    </StackPanel>
</Page>
MainPage.xaml.cs

using Windows.UI.Xaml.Controls;
using System.Collections.Generic;
using System;


namespace UniversalAppTutorials
{
    public sealed partial class MainPage : Page
    {
        public MainPage()
        {
            this.InitializeComponent();

            // Initialize a new empty Dictionary instance
            Dictionary<String, string> colors = new Dictionary<string, string>();

            // Put some key value pairs into the dictionary
            colors.Add("SILVER", "#C0C0C0");
            colors.Add("RED", "#FF0000");
            colors.Add("GREEN", "#008000");
            colors.Add("AQUA", "#00FFFF");
            colors.Add("PURPLE", "#800080");
            colors.Add("LIME", "#00FF00");

            // Finally, Specify the ComboBox items source
            ComboBox1.ItemsSource = colors;

            // Specify the ComboBox items text and value
            ComboBox1.SelectedValuePath = "Value";
            ComboBox1.DisplayMemberPath = "Key";
        }

        private void ComboBox1_SelectionChanged(object sender, SelectionChangedEventArgs e)
        {
            // Get the ComboBox instance
            ComboBox comboBox = sender as ComboBox;

            // Get the ComboBox selected item value and display on TextBlock
            TextBlock1.Text = "You selected:\n";
            TextBlock1.Text += "Value : " + comboBox.SelectedValue.ToString();
        }
    }
}

UWP - How to use ComboBox ItemsSource

UWP - ComboBox ItemsSource
The ComboBox class represents a selection control that combines a non-editable text box and a drop-down list box that allows UWP app users to select an item from a list. The ComboBox starts in a compact state and it expands to display a list of selectable items. The ComoboBox control is also known as a drop-down list.

The following UWP app development tutorial code demonstrates how we can use the ItemsSource property to data bind a ComboBox control. In this UWP example code, we populate the ComboBox with items from a String data type list. Here we applied a selection changed event for the ComboBox control to get its selected item when the app user makes the selection change.

The ItemsControl class’s ItemsSource property gets or sets an object source used to generate the content of the ItemsControl such as a ComboBox control. The ItemsSource property value type is an Object instance. This Object is used to generate the content of the ItemsControl such as the ComboBox. The ItemsSource property default value is null.

So the UWP app developers can data bind the ComboBox control using the ItemsControl class’s ItemsSource property. They just have to set the ItemsSource property value to the specified array or list or any items collection.
MainPage.xaml

<Page
    x:Class="UniversalAppTutorials.MainPage"
    xmlns="http://schemas.microsoft.com/winfx/2006/xaml/presentation"
    xmlns:x="http://schemas.microsoft.com/winfx/2006/xaml"
    xmlns:local="using:UniversalAppTutorials"
    xmlns:d="http://schemas.microsoft.com/expression/blend/2008"
    xmlns:mc="http://schemas.openxmlformats.org/markup-compatibility/2006"
    mc:Ignorable="d">
    <StackPanel 
        x:Name="stack_panel1" 
        Orientation="Horizontal"
        Background="YellowGreen"
        Padding="100"
        >
        <ComboBox 
            x:Name="ComboBox1" 
            Header="Select A Color"
            SelectionChanged="ComboBox1_SelectionChanged"
            >
        </ComboBox>
        <TextBlock
            x:Name="TextBlock1"
            FontFamily="Consolas"
            FontSize="25"
            Foreground="Navy"
            Margin="50,5,5,5"
            />
    </StackPanel>
</Page>
MainPage.xaml.cs

using Windows.UI.Xaml.Controls;
using System.Collections.Generic;
using System;


namespace UniversalAppTutorials
{
    public sealed partial class MainPage : Page
    {
        public MainPage()
        {
            this.InitializeComponent();

            // Initialize a new list of colors
            List<String> colors = new List<String>();

            // Put some colors to the list
            colors.Add("Red");
            colors.Add("Green");
            colors.Add("Blue");
            colors.Add("Yellow");
            colors.Add("Black");
            colors.Add("Olive");
            colors.Add("Pink");
            colors.Add("White");
            colors.Add("Magenta");

            // Finally, Specify the ComboBox items source
            ComboBox1.ItemsSource = colors;
        }

        private void ComboBox1_SelectionChanged(object sender, SelectionChangedEventArgs e)
        {
            // Get the ComboBox instance
            ComboBox comboBox = sender as ComboBox;

            // Get the ComboBox selected item text and display on TextBlock
            TextBlock1.Text = "You selected:\n";
            TextBlock1.Text += comboBox.SelectedValue.ToString();
        }
    }
}

UWP - How to use ComboBox ItemTemplate

UWP - ComboBox ItemTemplate
The ComboBox class represents a selection control that combines a non-editable text box and a drop-down list box that allows UWP app users to select an item from a list. The ComboBox starts in a compact state and it expands to display a list of selectable items. The ComoboBox control is also known as a drop-down list.

The ComboBox control is an ItemsControl that's why the UWP developers can put there a collection of items of any type. By default, the ComboBox data item is displayed as the string representation.

The ItemsControl class’s ItemTemplate property gets or sets the DataTemplate used to display each item. ItemTemplate property value is a DataTemplate instance which is the template that specifies the visualization of the data objects. The default value of this property is null. So using this ItemTemplate property the UWP developers can display custom-styled items inside a ComboBox.

The DataTemplate class describes the visual structure of a data object. This DataTemplate class is used for data binding for specific elements in the template that display the data values.

The ItemsControl class ItemsSource property gets or sets an object source used to generate the content of the ItemsControl. ItemsSource property lets us populate the ComboBox control with items from a list of objects.

The following UWP app development tutorial demonstrates how the developers can display a ComboBox control’s complex items by using the ItemTemplate and DataTemplate instead of the default string representation.
MainPage.xaml

<Page
    x:Class="UniversalAppTutorials.MainPage"
    xmlns="http://schemas.microsoft.com/winfx/2006/xaml/presentation"
    xmlns:x="http://schemas.microsoft.com/winfx/2006/xaml"
    xmlns:local="using:UniversalAppTutorials"
    xmlns:d="http://schemas.microsoft.com/expression/blend/2008"
    xmlns:mc="http://schemas.openxmlformats.org/markup-compatibility/2006"
    mc:Ignorable="d">
    <StackPanel 
        x:Name="stack_panel1" 
        Orientation="Vertical"
        Background="LightSkyBlue"
        Padding="50"
        >
        <ComboBox 
            x:Name="ComboBox1" 
            Header="Select A Book"
            SelectionChanged="ComboBox1_SelectionChanged"
            >
            <ComboBox.ItemTemplate>
                <DataTemplate>
                    <StackPanel 
                        Orientation="Vertical" 
                        Background="LightGoldenrodYellow"
                        Padding="8"
                        BorderBrush="Crimson"
                        BorderThickness="0,0,0,2"
                        >
                        <TextBlock
                            Text="{Binding BookName}"
                            FontWeight="Black"
                            FontFamily="Calibri"
                            FontSize="20"
                            TextWrapping="Wrap"
                            />
                        <TextBlock
                            Text="{Binding Author}"
                            FontStyle="Italic"
                            />
                        <TextBlock
                            Text="{Binding Price}"
                            Foreground="Navy"
                            />
                    </StackPanel>
                </DataTemplate>
            </ComboBox.ItemTemplate>
        </ComboBox>
    </StackPanel>
</Page>
MainPage.xaml.cs

using Windows.UI.Xaml.Controls;
using Windows.UI.Popups;
using System.Collections.Generic;


namespace UniversalAppTutorials
{
    public sealed partial class MainPage : Page
    {
        public MainPage()
        {
            this.InitializeComponent();

            // Initialize a new list of books
            List<Book> books = new List<Book>();

            // Add some items to collection
            books.Add(
                new Book(
                            "Professional Visual Studio 2012",
                            "Bruce Johnson",
                            "$59.99"
                    )
                );

            books.Add(
                new Book(
                            "Beginning ASP.NET for Visual Studio 2015",
                            "William Penberthy",
                            "$45.00"
                    )
                );

            books.Add(
                new Book(
                            "Beginning ASP.NET 4.5.1: in C# and VB",
                            "Imar Spaanjaars",
                            "$44.99"
                    )
                );

            books.Add(
                new Book(
                            "Professional C++, 3rd Edition",
                            "Marc Gregoire",
                            "$49.99 "
                    )
                );

            // Specify the ComboBox item source
            ComboBox1.ItemsSource = books;
        }

        public class Book
        {
            public string BookName { get; set; }
            public string Author { get; set; }
            public string Price { get; set; }

            public Book(string bookName, string author, string price)
            {
                this.BookName = bookName;
                this.Author = author;
                this.Price = price;
            }
        }

        private void ComboBox1_SelectionChanged(object sender, SelectionChangedEventArgs e)
        {
            // Get the instance of ComboBox
            ComboBox comboBox = sender as ComboBox;

            // Get the ComboBox selected item as a Book
            Book selectedBook = comboBox.SelectedItem as Book;

            // Initialize a new message dialog
            MessageDialog dialog = new MessageDialog(
                "Selected : \n"
                + selectedBook.BookName + "\n"
                + selectedBook.Author + "\n"
                + selectedBook.Price
                );

            // Finally, display the selected item details on dialog
            dialog.ShowAsync();
        }
    }
}

UWP - Drawing on a Canvas example

MainPage.xaml

<Page
    x:Class="UniversalAppTutorials.MainPage"
    xmlns="http://schemas.microsoft.com/winfx/2006/xaml/presentation"
    xmlns:x="http://schemas.microsoft.com/winfx/2006/xaml"
    xmlns:local="using:UniversalAppTutorials"
    xmlns:d="http://schemas.microsoft.com/expression/blend/2008"
    xmlns:mc="http://schemas.openxmlformats.org/markup-compatibility/2006"
    mc:Ignorable="d"
    >
    <Canvas x:Name="Canvas1" Background="AliceBlue">
    </Canvas>
</Page>
MainPage.xaml.cs

using Windows.UI.Xaml.Controls;
using Windows.UI.Xaml.Shapes;
using Windows.UI.Xaml.Media;
using Windows.UI;


namespace UniversalAppTutorials
{
    public sealed partial class MainPage : Page
    {
        public MainPage()
        {
            this.InitializeComponent();
            DarwOnCanvas();
        }

        void DarwOnCanvas() {
            // Initialize a new Line instance
            Line line = new Line();

            // Set the line x y position and length
            line.X1 = 100;
            line.X2 = 250;
            line.Y1 = 100;
            line.Y2 = 300;

            // Set the line color and width
            line.Stroke = new SolidColorBrush(Colors.SeaGreen);
            line.StrokeThickness = 15;

            // Set set line drawing position on canvas
            Canvas.SetTop(line,25);
            Canvas.SetLeft(line, 75);

            // Set the line ZIndex value;
            Canvas.SetZIndex(line,1);

            // Finally, draw the line on canvas
            Canvas1.Children.Add(line);

            // Create a new ellipse and draw it on canvas
            Ellipse ellipse = new Ellipse();
            ellipse.Width = 150;
            ellipse.Height = 150;
            ellipse.Fill = new SolidColorBrush(Colors.HotPink);
            Canvas.SetLeft(ellipse,100);
            Canvas.SetTop(ellipse, 150);
            Canvas1.Children.Add(ellipse);
        }
    }
}

UWP - Canvas example

MainPage.xaml

<Page
    x:Class="UniversalAppTutorials.MainPage"
    xmlns="http://schemas.microsoft.com/winfx/2006/xaml/presentation"
    xmlns:x="http://schemas.microsoft.com/winfx/2006/xaml"
    xmlns:local="using:UniversalAppTutorials"
    xmlns:d="http://schemas.microsoft.com/expression/blend/2008"
    xmlns:mc="http://schemas.openxmlformats.org/markup-compatibility/2006"
    mc:Ignorable="d"
    >
    <!--
        Canvas
            Defines an area within which you can explicitly
            position child objects, using coordinates that
            are relative to the Canvas area.

        Canvas.ZIndex
            Gets or sets the Z-order of an element when that
            element is presented in its parent Canvas layout container.
    -->
    <Canvas Background="AliceBlue">
        <Ellipse
            Width="100"
            Height="100"
            Fill="Red"
            Canvas.Left="100"
            Canvas.Top="100"
            Canvas.ZIndex="2"
            />
        <Ellipse
            Width="100"
            Height="100"
            Fill="Green"
            Canvas.Left="150"
            Canvas.Top="100"
            Canvas.ZIndex="1"
            />
        <Ellipse
            Width="100"
            Height="100"
            Fill="Blue"
            Canvas.Left="150"
            Canvas.Top="150"
            Canvas.ZIndex="0"
            />
        <Ellipse
            Width="100"
            Height="100"
            Fill="Yellow"
            Canvas.Left="200"
            Canvas.Top="200"
            />
        <Ellipse
            Width="100"
            Height="100"
            Fill="HotPink"
            Canvas.Left="250"
            Canvas.Top="250"
            Canvas.ZIndex="1"
            />
    </Canvas>
</Page>

UWP - ScrollViewer scroll to bottom

UWP - ScrollViewer Scroll To Bottom
The ScrollViewer class represents a scrollable area that can contain other visible elements. The ScrollViewer control enables content to be displayed in a smaller area than its actual size. The ScrollViewer displays scrollbars when its content is not entirely visible.

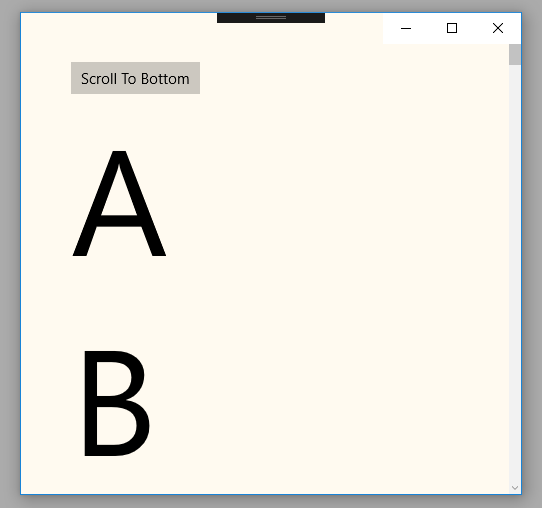
In the following UWP tutorial code, we put multiple TextBlock in a StackPanel control whose orientation is vertical. Then we wrap the StackPanel control with a ScrollViewer, so the users can scroll through the bottom of StackPanel content. The UWP developers use ScrollViewer container control to lets the user pan and zoom its content.

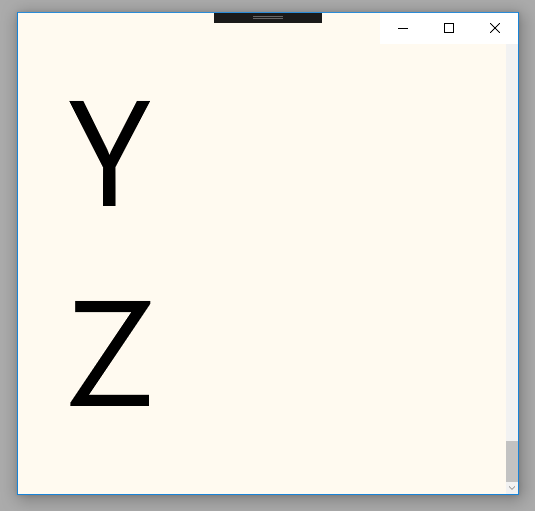
But in this UWP tutorial code, we will demonstrate how we can scroll to the bottom of ScrollViewer content programmatically. Here we use a Button control and its click event to programmatically scroll to the bottom of StackPanel contents. In this tutorial, we also set the ScrollViewer control’s HorizontalScrollBarVisibility and VerticalScrollBarVisibility properties value to Auto which means a ScrollBar appears only when the viewport cannot display all of the content.

The ScrollViewer class’s ChangeView(horizontalOffset, verticalOffset, zoomFactor) method overload causes the ScrollViewer to load a new view into the viewport using the specified offsets and zoom factor.

The horizontalOffset argument value data type is Double this value is between 0 and ScrollableWidth specifies the distance the content should be scrolled horizontally. The verticalOffset argument value data type is also a Double which is a value between 0 and ScrollableHeight that specifies the distance the content should be scrolled vertically.

And lastly, the zoomFactor argument value is a Single which is a value between MinZoomFactor and MaxZoomFactor that specifies the required target ZoomFactor. Using this ChangeView() method we can programmatically scroll to the bottom of this container content. Here we set the verticalOffset parameter value to double.MaxValue which indicates the bottom of the content.
MainPage.xaml

<Page
    x:Class="UniversalAppTutorials.MainPage"
    xmlns="http://schemas.microsoft.com/winfx/2006/xaml/presentation"
    xmlns:x="http://schemas.microsoft.com/winfx/2006/xaml"
    xmlns:local="using:UniversalAppTutorials"
    xmlns:d="http://schemas.microsoft.com/expression/blend/2008"
    xmlns:mc="http://schemas.openxmlformats.org/markup-compatibility/2006"
    mc:Ignorable="d"
    >
    <ScrollViewer
        x:Name="ScrollViewer1"
        Background="FloralWhite" 
        HorizontalScrollBarVisibility="Auto"
        VerticalScrollBarVisibility="Auto"
        >
        <StackPanel Orientation="Vertical" Padding="50">
            <Button
                x:Name="Button1"
                Content="Scroll To Bottom"
                Click="Button1_Click"
                />
            <TextBlock Text="A" FontSize="150"/>
            <TextBlock Text="B" FontSize="150"/>
            <TextBlock Text="C" FontSize="150"/>
            <TextBlock Text="D" FontSize="150"/>
            <TextBlock Text="E" FontSize="150"/>
            <TextBlock Text="F" FontSize="150"/>
            <TextBlock Text="G" FontSize="150"/>
            <TextBlock Text="H" FontSize="150"/>
            <TextBlock Text="I" FontSize="150"/>
            <TextBlock Text="J" FontSize="150"/>
            <TextBlock Text="K" FontSize="150"/>
            <TextBlock Text="L" FontSize="150"/>
            <TextBlock Text="M" FontSize="150"/>
            <TextBlock Text="N" FontSize="150"/>
            <TextBlock Text="O" FontSize="150"/>
            <TextBlock Text="P" FontSize="150"/>
            <TextBlock Text="Q" FontSize="150"/>
            <TextBlock Text="R" FontSize="150"/>
            <TextBlock Text="S" FontSize="150"/>
            <TextBlock Text="T" FontSize="150"/>
            <TextBlock Text="U" FontSize="150"/>
            <TextBlock Text="V" FontSize="150"/>
            <TextBlock Text="W" FontSize="150"/>
            <TextBlock Text="X" FontSize="150"/>
            <TextBlock Text="Y" FontSize="150"/>
            <TextBlock Text="Z" FontSize="150"/>
        </StackPanel>
    </ScrollViewer>
</Page>
MainPage.xaml.cs

using Windows.UI.Xaml.Controls;
using Windows.UI.Xaml;


namespace UniversalAppTutorials
{
    public sealed partial class MainPage : Page
    {
        public MainPage()
        {
            this.InitializeComponent();
        }

        private void Button1_Click(object sender, RoutedEventArgs e)
        {
            /*
                UIElement.UpdateLayout
                    Ensures that all positions of child objects of
                    a UIElement are properly updated for layout.
            */

            ScrollViewer1.UpdateLayout();

            /*
                ScrollViewer.ChangeView
                    Causes the ScrollViewer to load a new view into
                    the viewport using the specified offsets and zoom factor.
            */

            // Programmatically scroll to bottom
            ScrollViewer1.ChangeView(
                0.0f, // horizontalOffset
                double.MaxValue, // verticalOffset
                1.0f // zoomFactor
                );

            // Another way to programmatically scroll to bottom
            // But above way is better
            //ScrollViewer1.ScrollToVerticalOffset(ScrollViewer1.ScrollableHeight);
        }
    }
}

UWP - How to use ScrollViewer


UWP ScrollViewer


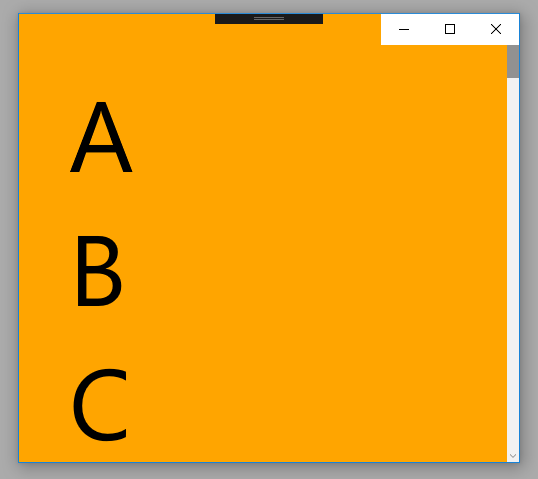
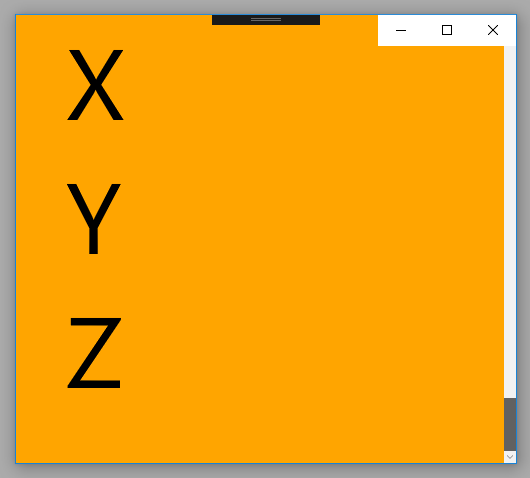
The ScrollViewer class represents a scrollable area that can contain other visible elements. The following UWP app development tutorial code will demonstrate how we can use a ScrollViewer in a UWP application to enable the scrolling capability of the inside elements.


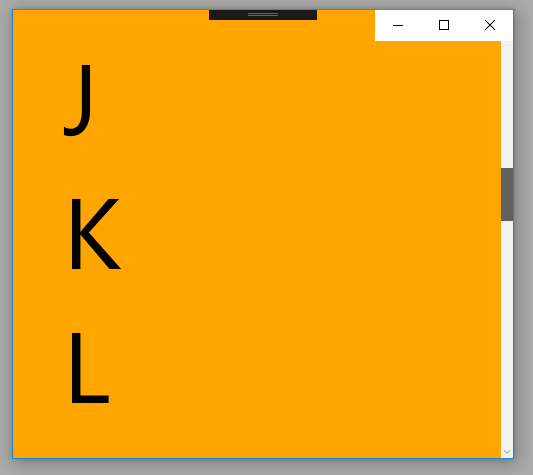
Here we put multiple TextBlock in a StackPanel control whose orientation is vertical. Then we wrap the StackPanel control with a ScrollViewer, so the users can scroll through the bottom of StackPanel content. The UWP developers use ScrollViewer container control to lets the user pan and zoom its content.


The ScrollViewer control enables content to be displayed in a smaller area than its actual size. The ScrollViewer displays scrollbars when its content is not entirely visible.


The ScrollViewer class’s HorizontalScrollBarVisibility property gets or sets a value that indicates whether a horizontal ScrollBar should be displayed in a ScrollViewer. This property value is a ScrollBarVisibility value that indicates whether a horizontal ScrollBar should be displayed. The default value of this property is Disabled. Here we used the value Auto which means a ScrollBar appears only when the viewport cannot display all of the content.


The ScrollViewer class VerticalScrollBarVisibility property gets or sets a value that indicates whether a vertical ScrollBar should be displayed. This property value is also a ScrollBarVisibility enum value that indicates whether a vertical ScrollBar should be displayed. The default value of this property is Visible. In this example code, we set this property value to Auto.


MainPage.xaml


<Page
x:Class="UniversalAppTutorials.MainPage"
xmlns="http://schemas.microsoft.com/winfx/2006/xaml/presentation"
xmlns:x="http://schemas.microsoft.com/winfx/2006/xaml"
xmlns:local="using:UniversalAppTutorials"
xmlns:d="http://schemas.microsoft.com/expression/blend/2008"
xmlns:mc="http://schemas.openxmlformats.org/markup-compatibility/2006"
mc:Ignorable="d"
>
<ScrollViewer
Background="Orange"
HorizontalScrollBarVisibility="Auto"
VerticalScrollBarVisibility="Auto"
>
<!--
Use StackPanel Vertical orientation to enable
contents vertical scrolling. And use StackPanel
Horizontal orientation to enable contents horizontal scrolling.
-->
<StackPanel Orientation="Vertical" Padding="50">
<TextBlock Text="A" FontSize="100"/>
<TextBlock Text="B" FontSize="100"/>
<TextBlock Text="C" FontSize="100"/>
<TextBlock Text="D" FontSize="100"/>
<TextBlock Text="E" FontSize="100"/>
<TextBlock Text="F" FontSize="100"/>
<TextBlock Text="G" FontSize="100"/>
<TextBlock Text="H" FontSize="100"/>
<TextBlock Text="I" FontSize="100"/>
<TextBlock Text="J" FontSize="100"/>
<TextBlock Text="K" FontSize="100"/>
<TextBlock Text="L" FontSize="100"/>
<TextBlock Text="M" FontSize="100"/>
<TextBlock Text="N" FontSize="100"/>
<TextBlock Text="O" FontSize="100"/>
<TextBlock Text="P" FontSize="100"/>
<TextBlock Text="Q" FontSize="100"/>
<TextBlock Text="R" FontSize="100"/>
<TextBlock Text="S" FontSize="100"/>
<TextBlock Text="T" FontSize="100"/>
<TextBlock Text="U" FontSize="100"/>
<TextBlock Text="V" FontSize="100"/>
<TextBlock Text="W" FontSize="100"/>
<TextBlock Text="X" FontSize="100"/>
<TextBlock Text="Y" FontSize="100"/>
<TextBlock Text="Z" FontSize="100"/>
</StackPanel>
</ScrollViewer>
</Page>


UWP - RelativePanel example

MainPage.xaml

<Page
    x:Class="UniversalAppTutorials.MainPage"
    xmlns="http://schemas.microsoft.com/winfx/2006/xaml/presentation"
    xmlns:x="http://schemas.microsoft.com/winfx/2006/xaml"
    xmlns:local="using:UniversalAppTutorials"
    xmlns:d="http://schemas.microsoft.com/expression/blend/2008"
    xmlns:mc="http://schemas.openxmlformats.org/markup-compatibility/2006"
    mc:Ignorable="d"
    >
    <RelativePanel Background="AliceBlue" Padding="50">
        <TextBlock
            x:Name="SignInText"
            Text="Sign In"
            RelativePanel.AlignHorizontalCenterWithPanel="True"
            Foreground="Black"
            FontSize="30"
            FontWeight="Normal"
            CharacterSpacing="200"
            />
        <TextBox
            x:Name="UserName"
            Header="User Name"
            RelativePanel.Below="SignInText"
            RelativePanel.AlignLeftWithPanel="True"
            RelativePanel.AlignRightWithPanel="True"
            />
        <TextBox
            x:Name="Password"
            Header="Password"
            RelativePanel.Below="UserName"
            RelativePanel.AlignLeftWithPanel="True"
            RelativePanel.AlignRightWithPanel="True"
            />
        <Button
            x:Name="SignIn"
            Content="Sign In"
            RelativePanel.Below="Password"
            RelativePanel.AlignRightWithPanel="True"
            Margin="5,5,0,5"
            Padding="25,5,25,5"
            />
        <Button
            x:Name="Cancel"
            Content="Cancel"
            RelativePanel.Below="Password"
            RelativePanel.LeftOf="SignIn"
            Margin="5,5,0,5"
            Padding="25,5,25,5"
            />
        <CheckBox
            x:Name="RememberMe"
            Content="Remember Me"
            RelativePanel.Below="Cancel"
            />
        <HyperlinkButton
            x:Name="Forgot"
            Content="FORGOT PASSWORD?"
            RelativePanel.Below="RememberMe"
            RelativePanel.AlignHorizontalCenterWithPanel="True"
            Margin="5,25,5,5"
            />
        <HyperlinkButton
            x:Name="NoAccount"
            Content="DONT HAVE AN ACCOUNT?"
            RelativePanel.Below="Forgot"
            RelativePanel.AlignHorizontalCenterWithPanel="True"
            />
    </RelativePanel>
</Page>

UWP - RelativePanel stretch example

MainPage.xaml

<Page
    x:Class="UniversalAppTutorials.MainPage"
    xmlns="http://schemas.microsoft.com/winfx/2006/xaml/presentation"
    xmlns:x="http://schemas.microsoft.com/winfx/2006/xaml"
    xmlns:local="using:UniversalAppTutorials"
    xmlns:d="http://schemas.microsoft.com/expression/blend/2008"
    xmlns:mc="http://schemas.openxmlformats.org/markup-compatibility/2006"
    mc:Ignorable="d"
    >
    <RelativePanel Background="AliceBlue" Padding="50">
        <!-- 
            Stretch element horizontally,
            parent left to right edge.
        -->
        <Rectangle
            x:Name="Red"
            Fill="Red"
            Height="50"
            RelativePanel.AlignLeftWithPanel="True"
            RelativePanel.AlignRightWithPanel="True"
            />
        <!-- 
            Stretch element vertically,
            parent top to bottom edge.
        -->
        <Rectangle
            x:Name="Green"
            Fill="Green"
            Width="40"
            RelativePanel.AlignRightWithPanel="True"
            RelativePanel.AlignTopWithPanel="True"
            RelativePanel.AlignBottomWithPanel="True"
            />
        <Rectangle
            x:Name="Blue"
            Fill="Blue"
            Height="30"
            RelativePanel.AlignBottomWithPanel="True"
            RelativePanel.AlignLeftWithPanel="True"
            RelativePanel.AlignRightWithPanel="True"
            />
        <Rectangle
            x:Name="Yellow"
            Fill="Yellow"
            Width="20"
            RelativePanel.AlignLeftWithPanel="True"
            RelativePanel.AlignTopWithPanel="True"
            RelativePanel.AlignBottomWithPanel="True"
            />
        <TextBox
            x:Name="TextBox1"
            Text="Hello UWP."
            RelativePanel.AlignVerticalCenterWithPanel="True"
            RelativePanel.AlignLeftWithPanel="True"
            RelativePanel.AlignRightWithPanel="True"
            />
    </RelativePanel>
</Page>

UWP - Understanding RelativePanel elements position

MainPage.xaml

<Page
    x:Class="UniversalAppTutorials.MainPage"
    xmlns="http://schemas.microsoft.com/winfx/2006/xaml/presentation"
    xmlns:x="http://schemas.microsoft.com/winfx/2006/xaml"
    xmlns:local="using:UniversalAppTutorials"
    xmlns:d="http://schemas.microsoft.com/expression/blend/2008"
    xmlns:mc="http://schemas.openxmlformats.org/markup-compatibility/2006"
    mc:Ignorable="d"
    >
    <RelativePanel Background="AliceBlue" Padding="50">
        <Rectangle
            x:Name="Red"
            Fill="Red" 
            Width="50" 
            Height="50"
            RelativePanel.AlignHorizontalCenterWithPanel="True"
            RelativePanel.AlignVerticalCenterWithPanel="True"
            />
        <Rectangle
            x:Name="Green"
            Fill="Green"
            Width="50"
            Height="50"
            RelativePanel.Above="Red"
            RelativePanel.AlignLeftWith="Red"
            />
        <Rectangle
            x:Name="Yellow"
            Fill="Yellow"
            Width="50"
            Height="50"
            RelativePanel.Below="Red"
            RelativePanel.AlignLeftWith="Red"
            />
        <Rectangle
            x:Name="Blue"
            Fill="Blue"
            Width="50"
            Height="50"
            RelativePanel.LeftOf="Red"
            RelativePanel.AlignBottomWith="Red"
            />
        <Rectangle
            x:Name="Olive"
            Fill="Olive"
            Width="50"
            Height="50"
            RelativePanel.RightOf="Red"
            RelativePanel.AlignBottomWith="Red"
            />
        <Rectangle
            x:Name="Orchid"
            Fill="Orchid"
            Width="50"
            Height="50"
            RelativePanel.Above="Green"
            RelativePanel.LeftOf="Green"
            />
        <Rectangle
            x:Name="Orange"
            Fill="Orange"
            Width="50"
            Height="50"
            RelativePanel.Below="Olive"
            RelativePanel.RightOf="Olive"
            />
        <Rectangle
            x:Name="Black"
            Fill="Black"
            Width="50"
            Height="50"
            RelativePanel.AlignTopWithPanel="True"
            />
        <Rectangle
            x:Name="DodgerBlue"
            Fill="DodgerBlue"
            Width="50"
            Height="50"
            RelativePanel.AlignTopWithPanel="True"
            RelativePanel.AlignRightWithPanel="True"
            />
        <Rectangle
            x:Name="SeaGreen"
            Fill="SeaGreen"
            Width="50"
            Height="50"
            RelativePanel.AlignBottomWithPanel="True"
            RelativePanel.AlignLeftWithPanel="True"
            />
        <Rectangle
            x:Name="Navy"
            Fill="Navy"
            Width="50"
            Height="50"
            RelativePanel.AlignBottomWithPanel="True"
            RelativePanel.AlignRightWithPanel="True"
            />
    </RelativePanel>
</Page>