AlertDialog setItems()
The AlertDialog is a subclass of Dialog that can display one, two, or
three Buttons. It can display a text message. Developers can display a more
complex View on the alert dialog window using a custom View.Android
developers even can display a list of items inside an alert dialog window.
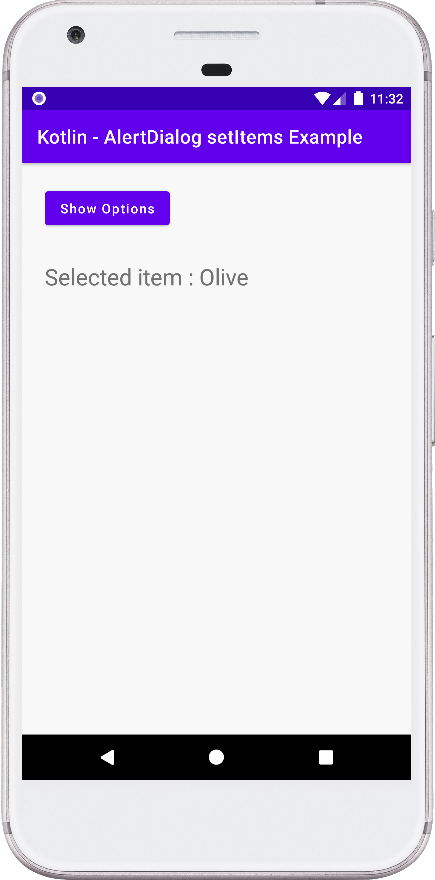
The following android application development tutorial will demonstrate to us how we can display a list of items in the alert dialog window as the content. And how developers can be notified when users select an item from the list via the supplied listener. Android developers can add a click listener for the alert dialog list items.
To create an alert dialog developers have to initialize an instance of AlertDialog.Builder object. This AlertDialog Builder object can define the alert dialog’s various properties such as button, message, icon, list and etc. Finally, they can create an AlertDialog using this builder instance.
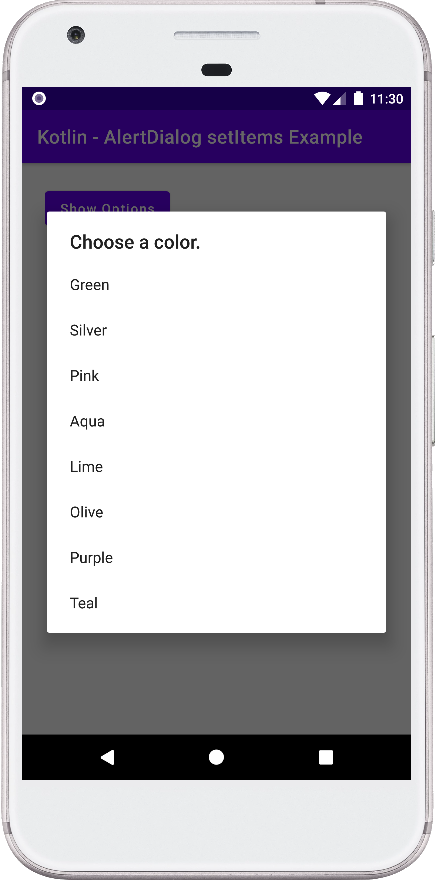
So how can android developers display a list of items with a click listener inside the alert dialog? By using the AlertDialog Builder instance developers can set its content to a list of items. The android SDK displays the list of items inside a dialog window in a good format and position.
The AlertDialog Builder object’s setItems() method set a list of items to be displayed as the content of the alert dialog window. This method also allows us to set a click listener for the list items. So developers can be programmatically notified in real-time which item is selected from the list. This setItems() method takes two arguments which are ‘items’ and ‘listener’. The ‘items’ argument represents an array of items and the ‘listener’ argument passes a click event listener for the list items.
This android kotlin tutorial code is written in an android studio IDE. Copy the code and paste it into your android studio IDE and run it on an emulator to see how we create an AlertDialog with a list of items and allow users to select an item from them in an android application.
And how we handle the click events for the alert dialog’s items list in an application. We displayed screenshots of the emulator screen, which also help you to understand the code without running it on an android device or emulator.
The following android application development tutorial will demonstrate to us how we can display a list of items in the alert dialog window as the content. And how developers can be notified when users select an item from the list via the supplied listener. Android developers can add a click listener for the alert dialog list items.
To create an alert dialog developers have to initialize an instance of AlertDialog.Builder object. This AlertDialog Builder object can define the alert dialog’s various properties such as button, message, icon, list and etc. Finally, they can create an AlertDialog using this builder instance.
So how can android developers display a list of items with a click listener inside the alert dialog? By using the AlertDialog Builder instance developers can set its content to a list of items. The android SDK displays the list of items inside a dialog window in a good format and position.
The AlertDialog Builder object’s setItems() method set a list of items to be displayed as the content of the alert dialog window. This method also allows us to set a click listener for the list items. So developers can be programmatically notified in real-time which item is selected from the list. This setItems() method takes two arguments which are ‘items’ and ‘listener’. The ‘items’ argument represents an array of items and the ‘listener’ argument passes a click event listener for the list items.
This android kotlin tutorial code is written in an android studio IDE. Copy the code and paste it into your android studio IDE and run it on an emulator to see how we create an AlertDialog with a list of items and allow users to select an item from them in an android application.
And how we handle the click events for the alert dialog’s items list in an application. We displayed screenshots of the emulator screen, which also help you to understand the code without running it on an android device or emulator.
MainActivity.kt
package com.cfsuman.kotlintutorials

import android.os.Bundle
import android.widget.Button
import android.widget.TextView
import androidx.appcompat.app.AlertDialog
import androidx.appcompat.app.AppCompatActivity


class MainActivity : AppCompatActivity() {
    private lateinit var context:MainActivity
    private lateinit var textView:TextView

    override fun onCreate(savedInstanceState: Bundle?) {
        super.onCreate(savedInstanceState)
        setContentView(R.layout.activity_main)

        // Get the context
        context = this;

        // Get the widgets reference from XML layout
        textView = findViewById(R.id.textView)
        val button = findViewById<Button>(R.id.button)

        // Button click listener
        button.setOnClickListener{
            // Show the single choice list items on an alert dialog
            showDialog()
        }
    }


    // Method to show an alert dialog with single choice list items
    private fun showDialog(){
        // Initialize an array of colors
        val array = arrayOf(
            "Green","Silver","Pink",
            "Aqua","Lime","Olive","Purple","Teal"
        )

        // Initialize a new instance of alert dialog builder object
        val builder = AlertDialog.Builder(context)

        // Set a title for alert dialog
        builder.setTitle("Choose a color.")

        // Set items form alert dialog
        builder.setItems(array) { _, which ->
            // Get the dialog selected item
            val selected = array[which]
            // Show the dialog selected item to text view
            textView.text  = "Selected item : $selected"
        }

        // Create a new AlertDialog using builder object
        val dialog = builder.create()

        // Finally, display the alert dialog
        dialog.show()
    }
}
activity_main.xml
<?xml version="1.0" encoding="utf-8"?>
<androidx.constraintlayout.widget.ConstraintLayout
    xmlns:android="http://schemas.android.com/apk/res/android"
    xmlns:app="http://schemas.android.com/apk/res-auto"
    android:layout_width="match_parent"
    android:layout_height="match_parent"
    android:id="@+id/rootLayout"
    android:background="#F8F8F8"
    android:padding="24dp">

    <Button
        android:id="@+id/button"
        android:layout_width="wrap_content"
        android:layout_height="wrap_content"
        android:text="Show Options"
        android:textAllCaps="false"
        app:layout_constraintStart_toStartOf="parent"
        app:layout_constraintTop_toTopOf="parent" />

    <TextView
        android:id="@+id/textView"
        android:layout_width="wrap_content"
        android:layout_height="wrap_content"
        android:layout_marginTop="32dp"
        android:fontFamily="sans-serif"
        android:textSize="24sp"
        app:layout_constraintStart_toStartOf="@+id/button"
        app:layout_constraintTop_toBottomOf="@+id/button" />

</androidx.constraintlayout.widget.ConstraintLayout>