Popup Window
The PopupWindow class represents a popup window. The PopupWindow class
is used to display an arbitrary view. The popup window is a floating container
and it appears on top of the current activity.
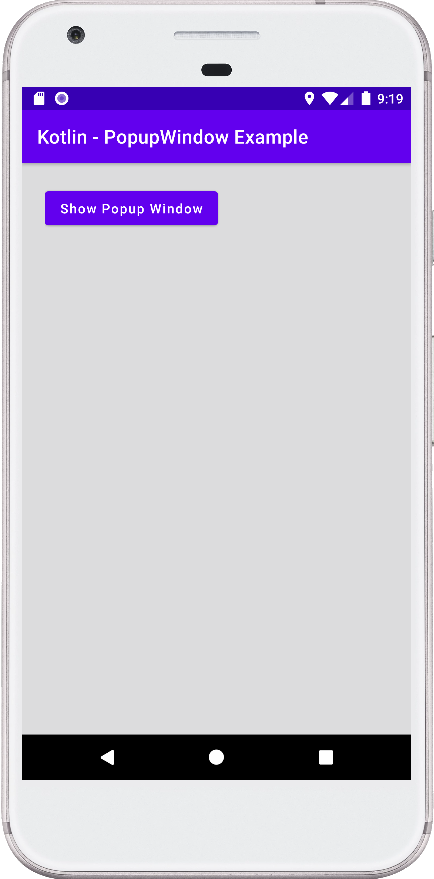
The following android application development tutorial will demonstrate to us how we can create and display a popup window in an application. We used the Kotlin programming language to write the code for this tutorial. We also applied the enter and exit transition for the popup window.
To show a popup window on top of the current activity, at first we create a custom view. Using the LayoutInflater we inflate the custom view. Then we create a new instance of PopupWindow with this inflated view. We also define the popup window width and height in this constructor. We set an elevation for the Popup window so it looks natural on top of the activity.
We create an enter and exit animation for the popup window transitions. So the popup window shows an animation when it appears on top of the activity and it also animates itself when it exits from the screen.
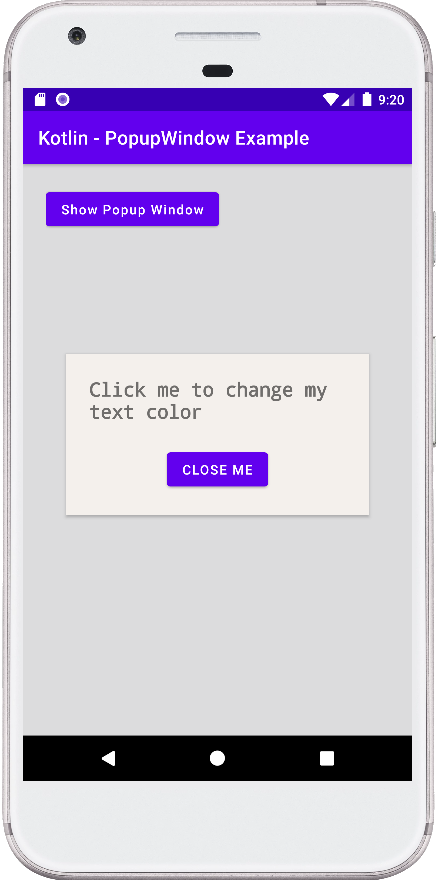
We get the references of the popup window widgets. So we set a click listener for the popup window’s TextView and another click listener for the Button widget. On the TextView click event, we change the text color of it and on the Button click event, we dismiss the popup window.
Here we put a popup window on dismiss listener. When the popup window is dismissed it shows a toast message. Finally, we show the popup window in a specified location of the root layout.
This android kotlin tutorial code is written in an android studio IDE. Copy the code and paste it into your android studio IDE and run it on an emulator to see how we create a popup window and display using animation in an android application.
And how we handle the popup window’s widgets events in an application. We displayed screenshots of the emulator screen, which also help you to understand the code without running it on an android device or emulator.
The following android application development tutorial will demonstrate to us how we can create and display a popup window in an application. We used the Kotlin programming language to write the code for this tutorial. We also applied the enter and exit transition for the popup window.
To show a popup window on top of the current activity, at first we create a custom view. Using the LayoutInflater we inflate the custom view. Then we create a new instance of PopupWindow with this inflated view. We also define the popup window width and height in this constructor. We set an elevation for the Popup window so it looks natural on top of the activity.
We create an enter and exit animation for the popup window transitions. So the popup window shows an animation when it appears on top of the activity and it also animates itself when it exits from the screen.
We get the references of the popup window widgets. So we set a click listener for the popup window’s TextView and another click listener for the Button widget. On the TextView click event, we change the text color of it and on the Button click event, we dismiss the popup window.
Here we put a popup window on dismiss listener. When the popup window is dismissed it shows a toast message. Finally, we show the popup window in a specified location of the root layout.
This android kotlin tutorial code is written in an android studio IDE. Copy the code and paste it into your android studio IDE and run it on an emulator to see how we create a popup window and display using animation in an android application.
And how we handle the popup window’s widgets events in an application. We displayed screenshots of the emulator screen, which also help you to understand the code without running it on an android device or emulator.
MainActivity.kt
package com.cfsuman.kotlintutorials

import android.content.Context
import android.graphics.Color
import android.os.Bundle
import android.view.Gravity
import android.view.LayoutInflater
import android.widget.Button
import android.widget.PopupWindow
import android.widget.TextView
import android.widget.Toast
import androidx.appcompat.app.AppCompatActivity
import androidx.constraintlayout.widget.ConstraintLayout
import androidx.constraintlayout.widget.ConstraintLayout.LayoutParams
import android.transition.Slide
import android.transition.TransitionManager


class MainActivity : AppCompatActivity() {
    override fun onCreate(savedInstanceState: Bundle?) {
        super.onCreate(savedInstanceState)
        setContentView(R.layout.activity_main)

        // Get the widgets reference from XML layout
        val rootLayout = findViewById<ConstraintLayout>(R.id.rootLayout)
        val button = findViewById<Button>(R.id.button)

        // Button click listener
        button.setOnClickListener {
            // Initialize a new layout inflater instance
            val inflater: LayoutInflater = getSystemService(
                Context.LAYOUT_INFLATER_SERVICE
            ) as LayoutInflater

            // Inflate a custom view using layout inflater
            val view = inflater.inflate(R.layout.popup_view,null)

            // Initialize a new instance of popup window
            val popupWindow = PopupWindow(
                view, // Custom view to show in popup window
                LayoutParams.WRAP_CONTENT, // Width of popup window
                LayoutParams.WRAP_CONTENT // Window height
            )

            // Set an elevation for the popup window
            popupWindow.elevation = 10.0F

            // Slide animation for popup window enter transition
            val slideIn = Slide()
            slideIn.slideEdge = Gravity.TOP
            popupWindow.enterTransition = slideIn

            // Slide animation for popup window exit transition
            val slideOut = Slide()
            slideOut.slideEdge = Gravity.END
            popupWindow.exitTransition = slideOut

            // Get the widgets reference from custom view
            val tv = view.findViewById<TextView>(R.id.textView)
            val buttonPopup = view.findViewById<Button>(R.id.buttonPopup)

            // Set click listener for popup window's text view
            tv.setOnClickListener{
                // Change the text color of popup window's text view
                tv.setTextColor(Color.parseColor("#3EB489"))
            }

            // Set a click listener for popup's button widget
            buttonPopup.setOnClickListener{
                // Dismiss the popup window
                popupWindow.dismiss()
            }

            // Set a dismiss listener for popup window
            popupWindow.setOnDismissListener {
                Toast.makeText(
                    applicationContext,
                    "Popup closed",
                    Toast.LENGTH_SHORT
                ).show()
            }

            // Finally, show the popup window on app
            TransitionManager.beginDelayedTransition(rootLayout)
            popupWindow.showAtLocation(
                rootLayout, // Location to display popup window
                Gravity.CENTER, // Layout position to display popup
                0, // X offset
                0 // Y offset
            )
        }
    }
}
activity_main.xml
<?xml version="1.0" encoding="utf-8"?>
<androidx.constraintlayout.widget.ConstraintLayout
    xmlns:android="http://schemas.android.com/apk/res/android"
    xmlns:app="http://schemas.android.com/apk/res-auto"
    xmlns:tools="http://schemas.android.com/tools"
    android:id="@+id/rootLayout"
    android:layout_width="match_parent"
    android:layout_height="match_parent"
    android:padding="24dp"
    android:background="#DCDCDD">

    <Button
        android:id="@+id/button"
        android:layout_width="wrap_content"
        android:layout_height="wrap_content"
        android:text="Show Popup Window"
        android:textAllCaps="false"
        app:layout_constraintTop_toTopOf="parent"
        app:layout_constraintStart_toStartOf="parent"/>

</androidx.constraintlayout.widget.ConstraintLayout>
popup_view.xml
<?xml version="1.0" encoding="utf-8"?>
<androidx.constraintlayout.widget.ConstraintLayout
    xmlns:android="http://schemas.android.com/apk/res/android"
    xmlns:app="http://schemas.android.com/apk/res-auto"
    xmlns:tools="http://schemas.android.com/tools"
    android:layout_width="match_parent"
    android:layout_height="wrap_content"
    android:padding="24dp"
    android:background="#F4F0EC">

    <TextView
        android:id="@+id/textView"
        android:layout_width="wrap_content"
        android:layout_height="wrap_content"
        android:text="Click me to change my text color"
        android:fontFamily="monospace"
        android:textSize="20sp"
        android:textStyle="bold"
        app:layout_constraintEnd_toEndOf="parent"
        app:layout_constraintStart_toStartOf="parent"
        app:layout_constraintTop_toTopOf="parent" />

    <Button
        android:id="@+id/buttonPopup"
        android:layout_width="wrap_content"
        android:layout_height="wrap_content"
        android:layout_marginTop="24dp"
        android:text="Close Me"
        app:layout_constraintEnd_toEndOf="parent"
        app:layout_constraintStart_toStartOf="parent"
        app:layout_constraintTop_toBottomOf="@+id/textView" />

</androidx.constraintlayout.widget.ConstraintLayout>