This code snippet demonstrates how to programmatically apply a tint color to a drawable resource in an Android application written in Kotlin. It achieves this by fetching the drawable from resources and then manipulating it using the support library methods.
Code Breakdown
Import Statements: The code imports necessary classes for working with graphics (Color, PorterDuff), context (Context, ContextCompat), activity lifecycle (AppCompatActivity), drawable manipulation (DrawableCompat), and layout access (kotlinx.android.synthetic.main).
Activity Class:
MainActivityinherits fromAppCompatActivityand overrides theonCreatemethod, which is the entry point for the activity.
Loading Drawable:
- Inside
onCreate, the code retrieves the drawable resource named "ic_camera" usingContextCompat.getDrawable(context, R.drawable.ic_camera). This method ensures compatibility across different API levels. - The retrieved drawable is then set as the image source for
imageView.
- Inside
Tinting the Drawable:
- Another call to
ContextCompat.getDrawablefetches the same drawable resource. - The
applyfunction allows chaining operations on the retrieved drawable. DrawableCompat.wrap(this)ensures compatibility for tinting on older API versions.setTint(Color.RED)applies a red color tint to the drawable.setTintMode(PorterDuff.Mode.SRC_IN)defines how the tint color interacts with the original drawable colors. In this case, only the parts of the original drawable that are non-transparent will be colored red.- Finally,
imageView2.setImageDrawable(this)sets the modified drawable as the image source forimageView2.
- Another call to
Layout File (activity_main.xml):
- The layout file defines the user interface elements for the activity.
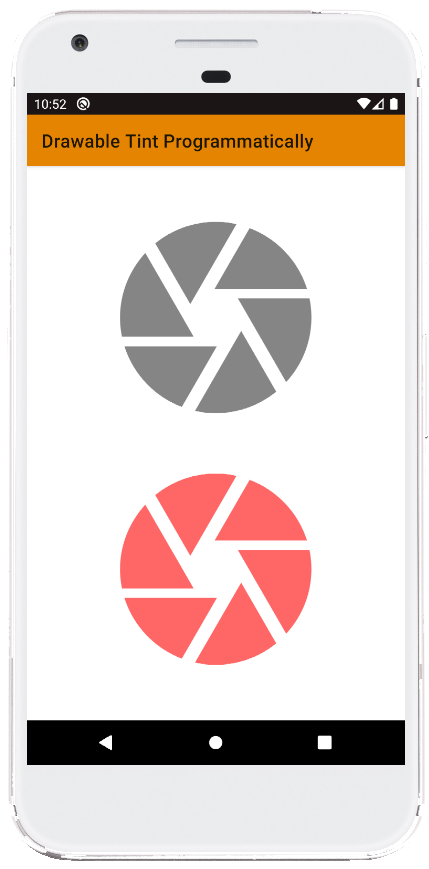
- It includes two
ImageViewelements with IDsimageViewandimageView2. These views will display the original and tinted versions of the drawable resource.
Summary
This code demonstrates a practical approach to programmatically tint drawable resources in an Android Kotlin application. By leveraging the ContextCompat and DrawableCompat classes, the code ensures compatibility across different API levels. The code also showcases the use of apply function for concise chaining of operations on the drawable object.
MainActivity.kt
package com.example.jetpack

import android.graphics.Color
import android.graphics.PorterDuff
import android.os.Bundle
import androidx.appcompat.app.AppCompatActivity
import androidx.core.content.ContextCompat
import androidx.core.graphics.drawable.DrawableCompat
import kotlinx.android.synthetic.main.activity_main.*


class MainActivity : AppCompatActivity() {

    override fun onCreate(savedInstanceState: Bundle?) {
        super.onCreate(savedInstanceState)
        setContentView(R.layout.activity_main)

        val context = this


        // set image view image from drawable
        imageView.setImageDrawable(ContextCompat.getDrawable(
            context,R.drawable.ic_camera
        ))


        // set drawable tint
        ContextCompat.getDrawable(context,R.drawable.ic_camera)?.apply {
            DrawableCompat.wrap(this).apply{
                setTint(Color.RED)
                setTintMode(PorterDuff.Mode.SRC_IN)
                imageView2.setImageDrawable(this)
            }
        }
    }
}
activity_main.xml
<?xml version="1.0" encoding="utf-8"?>
<androidx.constraintlayout.widget.ConstraintLayout
    xmlns:android="http://schemas.android.com/apk/res/android"
    xmlns:app="http://schemas.android.com/apk/res-auto"
    xmlns:tools="http://schemas.android.com/tools"
    android:id="@+id/constraintLayout"
    android:layout_width="match_parent"
    android:layout_height="match_parent"
    tools:context=".MainActivity">

    <ImageView
        android:id="@+id/imageView"
        android:layout_width="0dp"
        android:layout_height="250dp"
        android:layout_marginStart="16dp"
        android:layout_marginTop="16dp"
        android:layout_marginEnd="16dp"
        app:layout_constraintBottom_toTopOf="@+id/imageView2"
        app:layout_constraintEnd_toEndOf="parent"
        app:layout_constraintStart_toStartOf="parent"
        app:layout_constraintTop_toTopOf="parent"
        app:layout_constraintVertical_chainStyle="spread"
        tools:srcCompat="@tools:sample/avatars" />

    <ImageView
        android:id="@+id/imageView2"
        android:layout_width="0dp"
        android:layout_height="250dp"
        android:layout_marginStart="16dp"
        android:layout_marginEnd="16dp"
        android:layout_marginBottom="16dp"
        app:layout_constraintBottom_toBottomOf="parent"
        app:layout_constraintEnd_toEndOf="parent"
        app:layout_constraintStart_toStartOf="parent"
        app:layout_constraintTop_toBottomOf="@+id/imageView"
        tools:srcCompat="@tools:sample/avatars" />

</androidx.constraintlayout.widget.ConstraintLayout>
- android kotlin - BitmapShader example
- android kotlin - Bitmap tint solid color
- android kotlin - Bitmap sepia effect
- android kotlin - Bitmap lighting color filter
- android kotlin - ThumbnailUtils example
- android kotlin - Base64 string to bitmap
- android kotlin - ImageView grayscale filter
- android kotlin - Bitmap invert colors
- android kotlin - Set image from drawable
- android kotlin - Convert drawable to bitmap
- android kotlin - Create GradientDrawable Programmatically
- android kotlin - ActionBar background color programmatically
- android kotlin - ActionBar title style
- android kotlin - ActionBar title padding left