Introduction
File uploads are a common requirement in web applications, allowing users to transfer documents, images, or other files to a web server. ColdFusion provides a straightforward way to implement this functionality using the <cffile> tag, a powerful tool that simplifies file operations like uploading, reading, and writing files on the server. In this tutorial example, we will explore how to create a simple file upload form in ColdFusion using the <cffile> tag. The code demonstrates how to handle the upload process and manage the uploaded files efficiently.
This tutorial is designed to help developers understand the key components involved in uploading a file to a server, with a focus on creating a user-friendly form and handling file transfer securely. By the end of this explanation, you will have a clear understanding of how to configure file uploads, define server-side directories, and handle potential issues such as file overwriting.
The HTML Form for File Upload
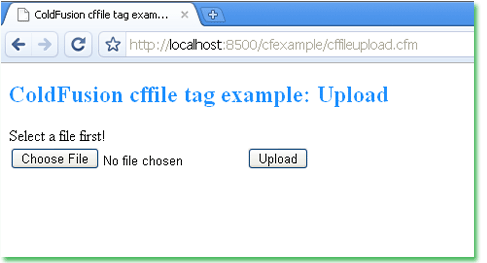
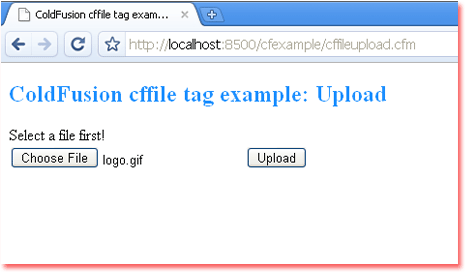
At the heart of the file upload process is the HTML form. In this ColdFusion example, a basic form is created with a file input field where users can select the file they wish to upload. The form uses the enctype="multipart/form-data" attribute, which is essential for handling file uploads, as it allows the form to send binary data in addition to text data. This form also includes a submit button, which triggers the file upload once the user has selected a file.
The action attribute of the form is left empty (action=""), which means that the form will submit to the same page (self-submission). When the user clicks "Upload," the form sends the file data to the server for processing.
Defining the Upload Directory
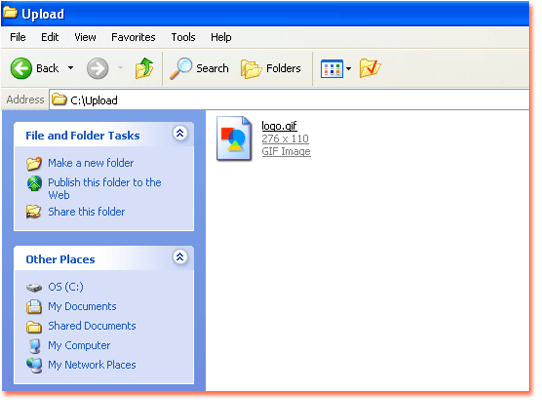
Before uploading a file, it’s important to define where the file will be stored on the server. In this example, the UploadFolder variable is set to a specific directory on the server (C:\Upload). This is done using ColdFusion's <cfset> tag, which creates a variable to hold the directory path. This folder path will be used as the destination for the uploaded file.
The choice of directory is crucial, as it determines where the files will be stored. Developers should ensure that the specified folder has the necessary permissions for write access so that ColdFusion can save the uploaded files without errors.
Handling the File Upload
The main logic for handling file uploads is contained within a ColdFusion <cfif> block. The code checks if the form field UploadFile has been submitted and is not empty. If this condition is met, the <cffile> tag is used to process the file upload. The key attributes of the <cffile> tag are:
action="upload": This specifies that ColdFusion should handle the action of uploading a file.filefield="UploadFile": This refers to the file input field in the HTML form.destination="#UploadFolder#": This specifies the directory where the uploaded file will be stored.nameconflict="overwrite": This instructs ColdFusion to overwrite any existing file with the same name in the destination folder.
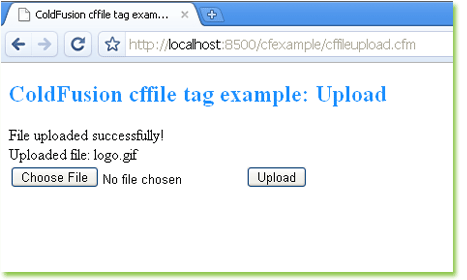
Once the file is successfully uploaded, ColdFusion outputs a confirmation message, along with the name of the uploaded file. The #cffile.ClientFile# variable is used to display the original name of the file that the user uploaded.
Error Handling and User Feedback
User feedback is a critical part of any web application, especially for file uploads, where errors can easily occur if the user does not select a file or if there are issues with the upload process. In this example, if the form is submitted without a file being selected, the user receives a message saying "Select a file first!" This ensures that the user is aware of any issues and can correct them.
Additionally, by using nameconflict="overwrite", the code ensures that file naming conflicts are resolved automatically. However, in a production environment, developers may opt for other strategies, such as renaming the file to avoid overwriting existing files.
Summary
ColdFusion provides a simple and effective way to handle file uploads using the <cffile> tag. This tutorial demonstrates how to create a basic file upload form, define a destination folder for uploaded files, and handle the upload process with minimal code. The example highlights key features such as checking if a file has been selected, managing file naming conflicts, and providing feedback to the user.
File uploads are a vital part of many web applications, and ColdFusion makes it easy to implement this functionality with robust tools for file management. With a few lines of code, developers can build efficient, user-friendly file upload systems that integrate seamlessly into their applications.
<!DOCTYPE html>
<html xmlns="http://www.w3.org/1999/xhtml">
<head>
<meta http-equiv="Content-Type" content="text/html; charset=utf-8" />
<title>ColdFusion cffile tag example: how to upload file</title>
</head>

<body>
<h2 style="color:DodgerBlue">ColdFusion cffile tag example: Upload</h2>

<cfset UploadFolder="C:\Upload">
<cfif IsDefined("Form.UploadFile") AND Form.UploadFile NEQ "">
 <cffile
     action="upload"
        filefield="UploadFile"
        destination="#UploadFolder#"
        nameconflict="overwrite"
        >
 File uploaded successfully!
    <br />
    Uploaded file: <cfoutput>#cffile.ClientFile#</cfoutput>
<cfelse>
 Select a file first!
</cfif>

<form name="UploadForm" method="post" enctype="multipart/form-data" action="">
 <input type="file" name="UploadFile">
    <input type="submit"  name="submit" value="Upload"/>
</form>

</body>
</html>


